X-Line is a state-of-the-art, radio-controlled projection screen designed to meet the highest standards in the business world and educational sector. X-Line combines innovative technology with adaptability, making it an optimal choice for companies and organizations seeking a seamless presentation experience
X-Line is equipped with a high-quality fabric and is powered by a reliable radio-controlled motor (433.92 MHz). It offers a range of remote control options. Included is a handheld single-channel remote control, and available as options are a 16-channel handheld, a wall-mounted model, and a projector trigger. The projector trigger is particularly useful as it automatically adjusts the screen in conjunction with the projector's activity – the screen lowers when the projector is turned on and retracts when it's turned off.
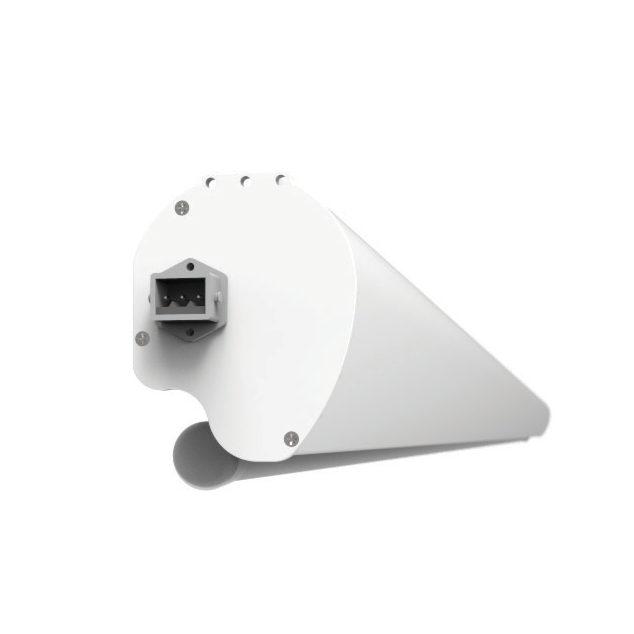
In the end cap of the screen, there's a connector with which you can cut the power. So, you don't need to have an electrician install a special work switch.
We understand the importance of flexibility. That's why all X-Line radio-controlled projection screens are manufactured in custom sizes. Our environmentally friendly aluminum casing offers a smart and elegant solution while facilitating installation. The very largest sizes have a wooden casing. When you select a model in the list, you can see what type of casing your chosen option has.
In terms of size, X-Line covers a broad spectrum with a maximum size of 6000x4000mm. This flexibility means you can tailor the size to your exact needs. If your special size is 1100x1900mm, you choose the variant ≤1200x2000mm. The symbol '≤' means 'less than or equal to'. Then you specify the desired special size, 1100x1900mm, in the text notation field.
If no specific dimensions are given, the screen is delivered in the stated maximum format.
With the product, a single-channel remote control is included, which is programmed to control your projection screen. All you need to do is to mount the projection screen in place and connect the accompanying cable to 230 volts. Then you can use the remote control to operate your projection screen..
The radio-controlled motor has memory capacity to pair with 19 additional remote controls beyond the one included in the delivery.
Each remote control can be linked to an infinite number of projection screens.
To pair a new remote control with your projection screen, first make the motor powerless by, for example, unplugging the electrical connector. Press and hold the up button on the new remote control and reconnect the power to the projection screen. Wait until the motor jerks or beeps, then release the button. Press the up button within ten seconds. Now the motor and remote control are paired.
If the projection screen moves in the wrong direction after pairing (it goes up when you press the down button), repeat the pairing routine but press the down button within ten seconds instead.
The projector trigger essentially works like a remote control. It is connected to the power supply cable of the projector and detects how much power the projector consumes. When the projector consumes more than the set value, a signal is sent to the motor in the projection screen to roll down. If the power falls below the set value, it rolls up.
On the back of the projector trigger, there are two holes marked CODE and SET. Inside the holes, there are buttons that you can access with, for example, a toothpick. When you are going to pair the projector trigger with a projection screen, make the projection screen powerless and press the CODE button on the projector trigger. Reconnect the power to the projection screen, release the CODE button, and press it again within 10 seconds. Now the projection screen and projector trigger are paired.
To set the power, make the motor powerless and reconnect it. Press SET for three seconds and see that the trigger's LED flashes, then start the projector within ten seconds with the energy setting you will use, and the trigger will now self-adjust to the power strength. If the trigger's LED flashes three times, everything has gone as planned; if it blinks once, you will have to try again.